When you think of wallpaper, what space fills your first thoughts? Right away do you think of your grandmas house? Or, do you think of a cool modern hotel? I really hope it’s the latter, because gone are the days of ugly 1960’s and 1970’s wallpaper. It’s come back, and it’s come back in elegant, modern and funky styles galore. Wallpaper tends to worry a lot of people because it can seem very permanent, but in all honesty, it’s really no more permanent than paint. It also takes about the same time as paint, when you factor in all of the prep work you should do to achieve a good paint job. And, if you aren’t an artist who can paint amazing things, wallpaper lets you achieve a unique look, you likely could never get with paint alone. One of the best places to try it out and see how you feel is in a bathroom! It’s less space you have to cover (which helps with cost and time of labor), it’s a room you don’t have to spend a lot of time in, so you can go bold and not worry about a print being overwhelming, and it’s a room you can really have fun with.
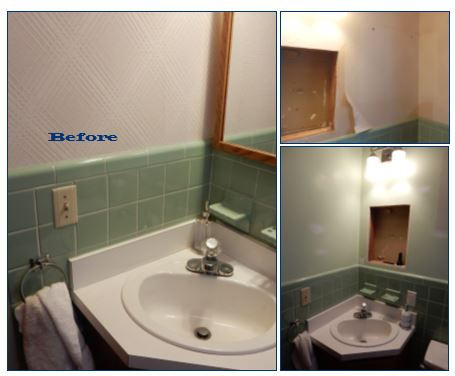
My parents recently moved into a new home – well, new to them, but the home was built in the 1950’s – and while most of the house has been redone and modernized, the bathrooms are truly vintage. What a lot of people would walk into and want to change, my mom (and I) fell in love with! One bathroom is covered in pink tile and the other in green. We love pretty much anything vintage and these bathrooms were no exception – but, they did need some help to bring them from the 20th century into the 21st. Of course, what better way to do that than to remove the dated wallpaper and give the space a fresh makeover with brand new wallpaper. And accessories too!

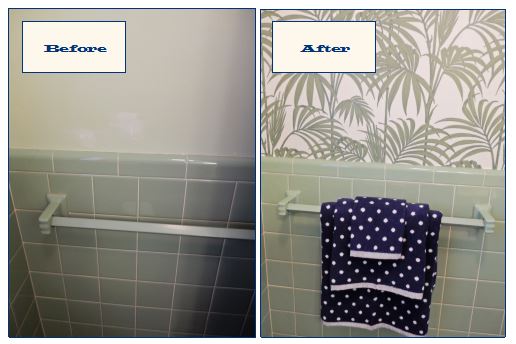
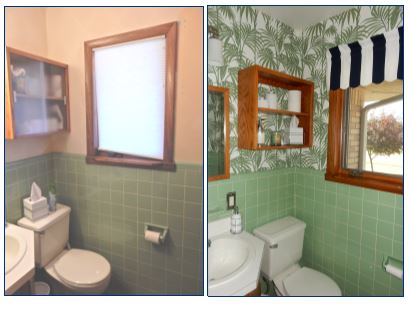
My mom and I decided to tackle the green bathroom first! I got my parents approval, but got to run with the design plan that almost immediately came to mind when I first saw the space. It seemed only fitting to make all those green tiles come to life by turning a dated space into a lush little oasis. I found a Graham & Brown paper I couldn’t resist, that would add depth and drama to the room, but was still airy enough to make the small space bright. The palm leaf pattern was only the beginning, as new accessories for the space and a new valance really made it feel complete. I pulled in navy for the linens, as there was just a hint of it in the paper, giving a little more dimension to the room. The bathroom didn’t originally have any window treatments, so blinds (a must for a bathroom on the ground floor) and a cute scalloped, cabana-striped valance (made by my mom) were a needed edition. We also added new silver accessories (lighting, light switches, soap dispenser, etc.) which give the space even more of a nautical edge.

A weekend project is all it took to make a vintage 1950’s bathroom new again! Below are the steps we took during the remodel, as well as some tips to make your next wallpaper reno as easy as possible. And since I know this will spark some inspiration in you, and you may soon be in the market for wallpaper of your own, I urge you to check out the endless options from Graham & Brown. With so many amazing papers, you may just want to wallpaper your entire house!


Steps:
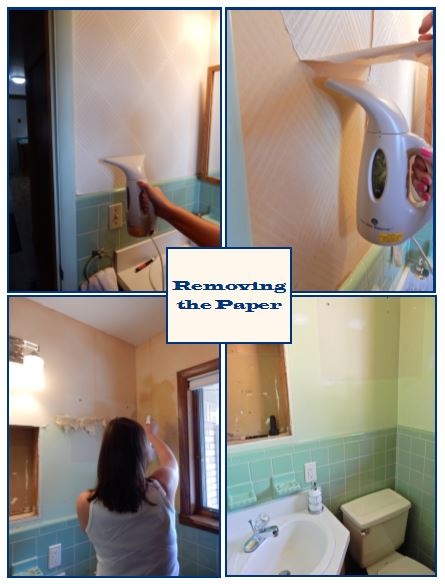
- Remove Original Wallpaper –This bathroom had very old wallpaper in it that was vinyl and took two steps to get off. We first used a steamer to remove the outer layer of paper. Then, we used a wallpaper removal spray to remove the inner layer. We sprayed in sections, let it sit a few minutes and then scraped it off with a wide-paddle paint scraper. This was a lot easier than anticipated since we used all the right tools! Clean up of course was less fun, as there was a lot to vacuum.
- Fill any holes in the wall and sand them – Use a primer over the newly filled holes, so the paper has something to stick to.
- Wash the walls thoroughly – You want a clean service for your wallpaper paste. This will definitely make is stick better and will give you a smooth surface to work on.
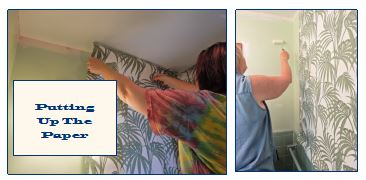
- Mix your paste – It’s important to follow the instructions to make sure the consistency is right for the type of paper you use. We used the paste Graham & Brown sent, and it worked really well. It’s best to apply it to the wall with a foam paint roller and to get into the edges with a paint brush. Keep in mind that a little goes a long way. If you will be taking breaks in-between panels or working over multiple days, be sure to put your paste in a seal-able container.
- Starting putting up the paper – Be sure to start on a straight edge. It’s best to make your own, since most walls aren’t perfectly level. Cut about 6 more inches than you need so you have a little extra at the top and bottom to work with. This becomes very important when lining up the pattern of your paper. (See my tip below for matching patterns.)


- Trim the edges – Use a wallpaper knife and a wallpaper blade to trim the edges of the paper and give a crisp look. (See tips below for finding the best one.)
- Double check for loose edges – Go around your room and make sure all edges of the paper are stuck down well. If there is anything loose, use a small paint brush to add glue to that space.
- Clean up and accessorize – Use a slightly damp cloth to wash off all excess paste from the edges of the walls and wallpaper seams when done. Let the wallpaper paste dry completely. Once dry, you can re-hang any fixtures or cabinets. Finally, add in your new accessories and enjoy your transformed space.

Tips:
- Order more than you need! Even in a very small bathroom, we used 2.5 rolls of Graham & Brown paper. You have to take into account that you will need to match patterns so each cut won’t be the same, and you should factor in room for error.
- Get a paper that is appropriate for a bathroom. The paper we used is vinyl and will hold up well with water splashes from the sink.
- Be sure to use the right tools, especially with thick paper. Something as simple as a utility knife to cut and trim the edges once the paper is on the wall is very important. This paper was thick and VERY hard to cut. We tried several different blades and styles, [causing some tears in the paper along the way – remember, leave room for error], before finding the right one.
- When you start, line the paper up with a straight edge (one you created) and be sure to work around the room in a circle, so your patterns match up all the way across.
- Match the pattern! If your space if 60 inches tall, you won’t be able to just cut six 60 inch panels, for example. You will need to line the patters up before making any cuts after the first panel is applied, and then cut accordingly.
- Remove any obstacles you can before you start. Things like light fixtures and cabinets are not easy to work around and the whole process becomes a lot easier if you have completely bare walls.
- Don’t be afraid to go bold, especially in the bathroom! Use a paper you really love, no matter how colorful or eccentric the pattern. As long as you keep the rest of the room in line with it, you can make it work. And remember, a bathroom is just a small room, and one you don’t have to spend a lot of time in. Because of this, you likely won’t tire easily of something so bold.

Signed with Style,
![]()

I love this!!
Seeking advice, since I am not very experienced with wallpaper. I have a gorgeous green-tiled bathroom similar to yours in my 1873 house in Illinois. It’s nearly pristine and just wonderful, but someone painted the upper walls in beige, which washes everything out and is just not interesting. I have a wallpaper in mind for those upper walls that will add a lot more drama, but it’s a RoomMates peel-and-stick, and this is a full bath where my husband and I have both recently been taking all of our showers (all the bathrooms in our house are a bit odd, and this happens to be the most comfortable/useful one right now). So it gets regular doses of a lot of steam, droplets, etc…just a lot of moisture. I’m afraid my preferred wallpaper is just not practical. Any thoughts on waterproofing and making it stay? Should I find a different pattern that comes on better material?
LikeLike
Hi Emily! So glad you are keeping the vintage charm and adding a fun update to your bathroom too. While the paper used in this bathroom was regular wallpaper with paste, I actually used a peel and stick paper in another bathroom, with a shower, and it’s worked very well! I would recommend not including it of course in the shower stall area, but all other walls should be okay. The corners were the only “issue” so used a very little bit of wallpaper paste there to keep those down. But it’s going on 2 years now and still looking great. Keep me posted on your progress – can’t wait to hear how it turns out!
LikeLike
Thank you for sharing!
LikeLike